










To register on Binance, you need an email address or phone number, a strong password, and—at a certain stage—an identity document. The process takes 10–15 minutes, but full access to all exchange features becomes available only after identity verification, which can take anywhere from a few minutes to a couple of days.

What you need to register on Binance
To create a Binance account, you only need a valid email address or phone number and a password. To use the exchange fully—buying, selling, and withdrawing large amounts—you will also need a passport or another identity document and a smartphone with a camera for selfie verification.
Formally, registration consists of two independent stages. The first is account creation: you enter your contact details, create a password, and confirm your identity using a code sent by email or SMS. This stage takes a couple of minutes and does not require documents. The second stage is identity verification (KYC, Know Your Customer), without which the account remains severely restricted: you cannot deposit or withdraw funds, trade above minimum limits, or use the P2P section.
You should also be prepared to specify your country of residence, as this determines which documents and funding methods will be available later. For most CIS countries, an international passport or a new-style internal passport with a machine-readable zone is suitable; driver's licenses are not accepted everywhere. The minimum registration age is 18, and the exchange checks the date of birth against the document and may block a minor's account even after the fact.
A referral code is not required at this stage, but if you have one, it must be entered once during registration and cannot be added later (see the section on referral codes below for details).
Can you register on Binance from Russia and the CIS
Technically, registration with a Russian IP address and Russian documents through the main Binance.com website is impossible: the exchange officially stopped serving users from Russia in 2023. At the same time, accounts registered earlier or through other jurisdictions continue to work partially, while users from most other CIS countries—Kazakhstan, Uzbekistan, Armenia, and Georgia—can register without restrictions.
| Country / status | Registration from a local IP | Main restrictions |
|---|---|---|
| Russia | Blocked | No access to the website, new accounts cannot be created, and old accounts have withdrawal restrictions |
| Kazakhstan | Available | The local regulator restricts certain P2P transactions |
| Ukraine | Available | Full access, including P2P in hryvnia |
| Belarus | Partially available | Verification issues may occur due to sanctions lists |
| Uzbekistan, Armenia, Georgia | Available | No significant restrictions |
Users from Russia who still want to register most often use a VPN with an exit location in a country where the exchange is available and provide the address and documents of that country or a third jurisdiction. The method works technically, but it is risky: it directly violates Binance's User Agreement, which prohibits bypassing geo-restrictions.
Risks for an account registered through a VPN
The exchange's security team analyzes not only the IP address used at registration but also subsequent activity: the interface language, the device's time zone, the linked card, and the IP addresses used at each login. If discrepancies are detected, the account may be frozen with a request to undergo verification again or closed with no right to recovery, while the funds in it may be blocked for an indefinite period.
A safer practice for those who permanently live in Russia is to use other major exchanges that are directly available (Bybit, OKX, HTX, and others), or to open a Binance account legally based on actual residence or citizenship in another country, if applicable. Some users open accounts through P2P platforms or local exchange partners, but that is a separate topic unrelated directly to registration.
If the account was registered before Binance left the Russian market, it usually continues to work for logging in and viewing the balance, but new deposits via Russian bank cards do not go through, and withdrawals may require additional verification of the residential address. The exchange generally does not allow you to change the country in the profile settings of an existing account—another reason to specify from the start the country whose documents you are actually prepared to verify.
Step-by-step registration via email
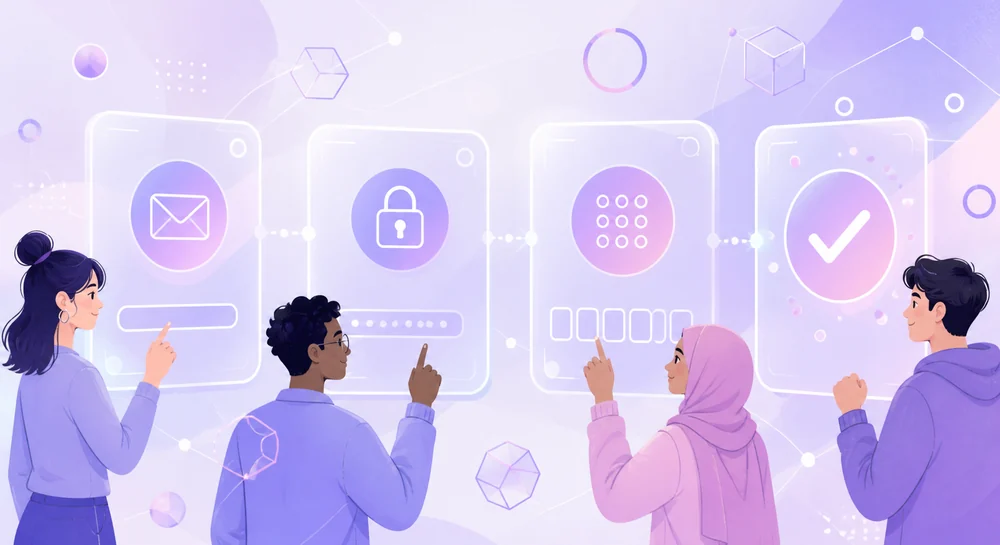
Registration via email takes five steps: going to the Binance website, entering your email and password, confirming the code from the email, agreeing to the terms of use, and logging in to your account for the first time. The entire process takes 5–10 minutes, provided the email with the code arrives quickly.
Step 1: go to the official website and choose a registration method
Only open the official binance.com address, entered manually or saved in your bookmarks — phishing copies of the site with similar domains (for example, with one letter replaced) regularly appear in search results and ads. On the homepage, the “Register” button is located in the upper-right corner. After clicking it, a form with two tabs opens — “Phone” and “Email”; select the second one for this section.
Step 2: Entering an email and creating a password
Enter a valid email address in the email field — a verification code will be sent to it, and login and transaction notifications will also arrive there later, so choose an inbox you check regularly and that has two-factor authentication enabled. Set a password below: the system checks it in real time and will not let you continue until the minimum requirements are met.
Binance password requirements: at least 8 characters, including at least one uppercase letter, one lowercase letter, and one digit. Special characters are not mandatory but are recommended. The password must not match the email address or contain obvious sequences such as “12345678” — the system rejects these with a separate warning.
Step 3: Completing the security check
Before sending the code, the site usually displays a CAPTCHA — you need to assemble a puzzle or rotate an image into the correct position, depending on the version of the check. This is standard protection against automated mass bot registrations, not a sign of problems with the account. If you do not solve the puzzle on the first attempt, the system simply offers you another try without any consequences for the account.
Step 4: Confirming the email with a code
After the CAPTCHA, a six-digit code, usually valid for 5–10 minutes, is sent to the specified email address. Enter it in the window that opens on the site. If the email does not arrive within a minute, check the “Spam” folder and click “Resend” — no more than once every 60 seconds; otherwise, the system temporarily blocks repeated code requests as a possible sign of code guessing.
Step 5: First login and what happens next
After you enter the correct code, the account is created and you are automatically redirected to your personal account — a dashboard with a zero balance, deposit buttons, and a profile menu. Basic registration is now complete, but most features are still unavailable: the exchange will immediately suggest completing identity verification and setting up two-factor authentication — both steps are covered in the following sections.
How to register faster and avoid mistakes
Open your inbox in an adjacent tab in advance so you do not lose the code when switching windows; use a password that you do not use on any other site — exchange accounts are most often hacked through leaks from other services rather than directly; and save the password in a password manager immediately instead of keeping it in your phone’s notes.
How registering with a phone number differs from email registration
Phone registration works exactly the same way as email registration, but the verification code arrives by SMS rather than email. The difference is not the complexity of the process, but which contact method the exchange considers primary for access recovery and security notifications.
Technically, the steps are identical: select the “Phone” tab on the registration form, enter the country code and number, set a password, complete the CAPTCHA, and enter the code from the SMS. The difference appears later, in two areas — access recovery and two-factor authentication settings.
Email registration
Pros: the code almost always arrives quickly and does not depend on a mobile operator; convenient if you plan to change your number or SIM card; easier to enable additional email alerts for suspicious activity. Cons: email inboxes are more often targeted by phishing and leaks from other services.
Phone registration
Pros: access recovery after changing devices is often faster, and a number is more difficult to spoof through social engineering than an email address; convenient for those who primarily use the mobile app. Cons: SMS messages may be delayed abroad, and the number is tied to the operator and physical SIM card, which can be lost when changing countries.
In practice, the choice of method has little effect on the account’s final capabilities: limits, P2P access, and withdrawals are determined by the verification level, not by how the account was created. The only practical difference is that with phone registration, the number becomes the default method for login and transaction confirmation, while an email can be added and verified separately after registration in the security section.
Choose a phone number if you plan to use the mobile app frequently and want push and SMS notifications to arrive at the same number without unnecessary switching, and if you consistently use the same SIM card and do not plan to change it. Email is better suited to those who travel frequently, change countries and SIM cards, or prefer using the exchange from a computer rather than a smartphone. Both methods are equally secure as long as the email and phone number are protected with their own two-factor authentication — otherwise, both are equally vulnerable to interception.
How to complete identity verification (KYC) on Binance
Verification consists of three steps: selecting the country and document type, uploading photos of both sides of the document and a selfie (including a video selfie with a head turn), after which the system checks the data automatically or sends it for manual review. Automatic verification takes from several minutes to half an hour, while manual review can take up to 2–3 business days.
The process starts from the personal account by clicking “Verify” or through a pop-up banner immediately after the first login. First, specify the document’s issuing country — it must match the country stated during registration; otherwise, the system will display a mismatch error. Then select the document type: passport, ID card, or driver’s license, depending on what is accepted in the specific country.
| Document | What to photograph | Typical reasons for rejection |
|---|---|---|
| International passport | The photo page and the machine-readable zone | Glare on the laminate, cropped page edge |
| Domestic passport | The photo spread and the registration spread | An outdated format without a machine-readable zone is not accepted in some countries |
| ID card | The front and back | Expired document, unreadable number |
| Driver’s license | The front and back | Not accepted in all countries — check the list when selecting the document |
How to take a selfie correctly for verification
The selfie must be live and taken directly in the app or on the website using the device’s camera — the system does not allow uploading an existing photo from the gallery. The system asks you to hold the document next to your face or perform a short sequence of movements — blink, turn your head — to filter out photos of photos and pre-prepared forgeries.
Why verification is most often rejected
The most common reasons are: a mismatch between the document details and the information entered in the form (even a typo in the date of birth); poor photo quality — blurriness, glare, cropped edges; an attempt to verify someone else’s identity; an expired document; or using a VPN with a country geolocation that does not match the document. When verification is rejected, the system usually indicates the reason and allows another attempt without limiting the number of attempts, but several rapid rejections in a row may temporarily block the function for 24 hours.
After submitting the information, the verification status appears in the account dashboard: “Under review,” “Approved,” or “Rejected,” with the reason provided. The result notification is also sent by email. If the status has not changed after 3 business days, contact support via the in-app chat — this usually means the application is stuck in a manual review queue rather than there being a problem with the documents.

How to improve your chances of passing verification on the first attempt
Take a photo of the document on a flat, opaque surface in daylight without flash, make sure all four corners and the entire text are visible in the frame, and enter your full name and date of birth in the form exactly as they appear in the document, including the word order and transliteration.
What verification levels are available on Binance
Binance has three main verification levels — Basic, Intermediate, and Advanced (Enhanced) — and each one unlocks a higher withdrawal limit and a broader range of features: P2P trading, fiat deposits, and derivatives. Without completing at least Basic verification, cryptocurrency withdrawals are usually limited to small amounts or unavailable altogether.
Basic is the minimum level completed by the vast majority of users: the document and selfie covered in the previous section. It is sufficient for basic trading, spot transactions, and withdrawals within the daily limit, which for most new accounts is noticeably below the maximum threshold at first — the exact amount depends on the country and account history and gradually increases with regular use without violations.
Intermediate adds proof of residential address — usually a utility bill, bank statement, or certificate issued no more than three months ago, showing a name and address matching those in the profile. This level removes some restrictions on P2P volumes and increases the daily withdrawal limit several times over, and in some countries also provides access to additional fiat funding methods.
Advanced (which may be called Enhanced in the interface) is primarily intended for those handling large amounts: institutional traders, active P2P merchants, and users whose daily transaction volume exceeds the standard limits. At this level, the exchange requests additional information about the source of funds and may sometimes require a video call with a support representative to confirm identity. For an ordinary beginner planning to hold and occasionally trade small amounts, there is no need to pursue this level immediately — Basic covers 90% of typical use cases.
The verification level is not the only factor affecting limits: the exchange also considers the account age, transaction history, and reputation metrics. Therefore, two users with the same KYC level may have different actual withdrawal limits — always check the current figures for your account in the “Identity Verification” section of the dashboard rather than relying on average values.
How to set up two-factor authentication and protect your account
Two-factor authentication (2FA) is set up in the “Security” section of the account dashboard: simply link an authenticator app or passkey and confirm it with a code sent by email or phone. Once enabled, the system will request a second code each time you log in, withdraw funds, or change key settings.
Binance supports several independent layers of protection, and the more of them are enabled, the harder it is for an attacker to gain access, even if the password has been leaked. The recommended minimum is email or phone (already confirmed during registration) plus a separate authenticator app; the advanced option adds a passkey and an anti-phishing code.
| Method | Protection level | When to use it |
|---|---|---|
| SMS code | Basic | As a backup method, not the primary one — vulnerable to SIM-swap attacks |
| Google Authenticator / equivalent | High | The primary method for most users; codes are generated offline |
| Passkey (device biometrics) | Very high | Log in with a fingerprint or Face ID without a password; linked to a specific device |
| Hardware security key (YubiKey and equivalents) | Maximum | For large balances and professional traders |
How to connect Google Authenticator
In the security section, select “Authenticator App,” scan the QR code that appears using Google Authenticator (or a compatible app such as Authy or 2FAS), and enter the generated six-digit code to confirm the link. A backup recovery code is then saved — write it down separately, preferably offline: without it, restoring access to 2FA after losing your phone is possible only through a lengthy identity verification procedure with support.
Why You Need an Anti-Phishing Code
An anti-phishing code is a custom phrase that you set in your security settings and that is then added to all official emails from Binance. A genuine exchange email will always contain this phrase; if an email appears to be from Binance but does not include the code or contains a different one, it is fraudulent, and you must not follow any links in it.
A Common 2FA Mistake Among Beginners
Storing a backup recovery code in a cloud screenshot or in a note protected with the same password as your email. If an attacker gains access to your email, they will also obtain your 2FA recovery code, meaning two-factor protection is no longer a second factor. It is better to write the backup code down on paper or store it in a separate password manager not linked to your primary email.
After enabling 2FA, you should also set up a withdrawal address whitelist (a list of approved wallets; withdrawals to new addresses are blocked for 24–48 hours) and a device manager that shows all active sessions and lets you remotely end unfamiliar logins. These settings are located in the same “Security” section and are discussed in more detail in a separate section below.
How to Link a Bank Card or Funding Method
You can link a funding method in the “Buy Crypto” or “Deposit” section of your account: available options include a bank card, bank transfer, P2P fiat purchases from other users, and, in some countries, local payment services. The available methods depend on the country specified during verification, not on the country where the card was issued.
Bank Card (Visa/Mastercard)
The fastest option, with funds credited within 1–5 minutes. The fee is usually higher than with other methods—an average of 1.8–2% of the amount, plus a possible bank fee for processing the transaction as an international transfer. The name on the card must match the name on the verified profile.
P2P Fiat Purchase
A direct purchase from another user, paid to a card or bank account through a local bank. The exchange itself charges no fee, but the seller’s rate may differ from the market rate by 0.5–3%. This is suitable when direct card funding is unavailable in the country.
For cards issued in Russia, direct funding through Binance’s main interface does not work for the same reasons described in the section on access from Russia and the CIS: payments with such cards are blocked at the exchange’s payment gateway level, regardless of how the account was created. Users in Kazakhstan, Armenia, Georgia, and most other CIS countries can generally fund their accounts directly by card, but you should check the bank’s limits on international transfers in advance, as some banks block such transactions without prior notice.
In addition to cards and P2P, a bank transfer may make sense for large amounts (SEPA for the eurozone, SWIFT for other regions). The fee is lower than for a card, but funds may take several hours to 1–2 business days to arrive. The minimum transfer amount is usually higher than for card funding.
Linking a card is confirmed by a small test charge or a 3D Secure code from the bank. This is a standard check that you are the cardholder, not an attempt at fraud. A card can be linked to only one verified Binance account; an attempt to link it to a second account with different passport details will usually result in both operations being automatically blocked pending investigation.
What to Do If Registration Fails or Your Account Is Blocked
Registration most often stops for one of five reasons: the region is unavailable, the document is already in use, the CAPTCHA is stuck, verification was rejected, or the account was temporarily blocked for suspicious activity. Each issue has a specific solution—from changing the network to contacting support—without needing to create a new account.
Region Unavailable—What to Do
If the site displays a message during registration saying that the service is unavailable in your region, it means that the country identified by your IP is on the restricted list. This is what happens with Russia and several other sanctioned countries. Using a VPN technically bypasses this message, but, as discussed in the section on registering from Russia and the CIS, it creates a risk that the newly created account will later be blocked. This is not a technical issue but a conscious trade-off that should be accepted in advance, not after the account is blocked.
“Document Already in Use”—What Does This Error Mean?
Binance stores a hash of the document data and does not allow the same passport to be verified on two different accounts. This prevents limits from being bypassed through multiple registrations. The error may occur if you registered before and forgot about it, if a typo in the submitted data prevented the system from recognizing the old account, or if someone else actually used your document without your knowledge. In the latter case, you should contact support immediately and provide proof of identity.
Why Verification Is Repeatedly Rejected
If verification is rejected three times in a row, the account may be temporarily restricted from making new attempts, usually for 24 hours. During this period, resubmitting the same photos is pointless: you need to read the reason for rejection in the email carefully and address that specific issue—photo quality, mismatched data, or document type—or the next attempt will also be rejected.
Account Blocked After Registration—How to Restore Access
A block immediately after registration is almost always related to inconsistent data: the IP does not match the declared country, the device was previously used for another account, or automated anti-fraud filters were triggered. Recovery is handled through the support section, using the “Account Recovery” form or chat. You will need to attach a photo of your document and an explanation of the situation; the typical review time is 1 to 5 business days, depending on support workload.
Frequently Asked Questions About Binance Registration
Below are brief answers to questions that often fall outside the main instructions: deleting an account, registering without an international passport, using the exchange without verification, changing your country of residence, and restoring access after losing contact details.
Can I Register and Complete Verification Without an International Passport?
Yes. In most CIS countries, a new-format domestic passport with a machine-readable zone is also accepted, while some countries accept an ID card or driver’s license. The system automatically shows the available document types after you select your country. If a domestic passport is not accepted, the corresponding field simply will not appear.
Can I Use Binance Without Identity Verification Just to Check Prices?
Yes. Price charts, the list of trading pairs, and general market information are available without registration at all—you can visit the site directly as a guest. An account, and especially verification, is required only for buying, selling, withdrawing, and any transactions involving real money.
Do I Need to Complete Verification Again After Moving to Another Country?
Formally, there is no automatic requirement, but if your new country of residence differs from the one specified during registration, you should update your profile details and address in the Intermediate verification section. Otherwise, when making a large withdrawal or undergoing a manual review, the system may request separate proof of your current place of residence. A mismatch between your address and IP address lasting several months can sometimes itself trigger an additional check.
Can I Register on Binance with a Work or School Email Address?
Technically, yes—there are no restrictions on the email domain, but this is not recommended. Access to a work or school email may be revoked when you leave your job or finish your studies, and without access to the linked email, account recovery becomes much more difficult. It is better to use a personal email that will remain with you long term and does not depend on a third party.
How to delete a Binance account if you no longer need it
There is no direct “delete account” button in the interface—the request must be submitted through customer support with identity verification. Before that, you need to withdraw all remaining funds so that the balance is zero across all sections (Spot, Funding, Earn) and cancel any open orders: an account with a non-zero balance or active operations will not be accepted for deletion, and the closure process itself usually takes anywhere from several days to two weeks.
How many Binance accounts can be registered from one device or IP address?
Limits on the number of accounts from one device or network are not formally published, but the anti-fraud system monitors matches and may request additional verification if several unrelated accounts are registered in succession from the same IP address or device. This is common in offices and families sharing Wi-Fi and usually does not result in a block, only a more thorough manual verification review.
What should you do if the verification code does not arrive by email or SMS for a long time?
First, check your Spam folder and make sure the phone number or address was entered correctly—a typo in one digit of the phone number sends the code to a random person instead of you. If nothing arrives within 5–10 minutes, request the code again (no more than once a minute) or switch to the other registration method: if email is not working, try your phone, and vice versa.
Can you recover access if you have lost both your email and phone?
Yes, but this is the longest recovery scenario: you will need the “Account Recovery” form, along with an uploaded document matching your verification details, and sometimes a video call with support to confirm your identity. This review takes anywhere from several days to two or three weeks—which is why backup contact methods should be set up in advance, not after access has been lost.
Is it worth using a referral code when registering
Yes, if you received the code from someone you know or a trusted source—it does not grant any additional rights, but it usually provides a discount on trading fees and sometimes a one-time cryptocurrency bonus after the first transactions. There is no downside: the code only identifies who invited the new user.
The referral program follows a simple structure: every Binance user has a personal referral link or code in the “Referral” section. If someone registers through this link or enters the code manually during account creation, both participants benefit—usually through a refund of part of the trading fees generated by the invited user for a specified period, sometimes up to a year or indefinitely, depending on the terms of the current promotion.
You can enter the code in two ways: follow the personal referral link, in which case the field is filled in automatically, or manually enter the code in the separate “Referral ID” field on the registration form. It is located below the email/phone and password fields and is often hidden under a link such as “Have a code?” or “Add code.”
Why the code cannot be added later
A referral code is linked to an account only at the time of registration. If you skip this field and create an account without a code, you cannot add it retroactively through support or the profile settings—the only way to receive a referral discount in this situation is to register a separate new account, which conflicts with the “one person—one account” rule discussed in the section on frequently asked registration questions. Therefore, if you have a code, enter it during registration rather than afterward.
The discount amount and terms are periodically changed by the exchange and are specified precisely in the “Referral” section of your account after registration. There, you can also see your personal discount rate if you later decide to invite other users. Using someone else’s code requires nothing from the new user—no additional documents, changes to limits, or obligations; it is solely a way to save on fees, not an account functionality issue.
How to secure your account immediately after registration
Immediately after registration, before making your first deposit, you should set up five things: a withdrawal address whitelist, an anti-phishing code, device management, login notifications, and a separate, non-reused password. This takes 10–15 minutes and covers most attack scenarios used against new accounts.
What a withdrawal address whitelist does
A whitelist is a list of pre-approved wallet addresses to which withdrawals are allowed without an additional 24-hour delay. If the feature is enabled, a withdrawal to any new address not included in the list is automatically blocked for up to 48 hours, even with the correct password and 2FA code. This gives you time to notice and cancel the transaction if the account has nevertheless been compromised.
It is enabled in “Security” → “Withdrawal Whitelist.” After activation, adding a new address to the list itself requires confirmation by email and 2FA, and it does not take effect immediately but only after a technical waiting period—usually several hours. This prevents an attacker from instantly adding their own address and withdrawing the funds right away.
Why device management is needed
The “Device Management” section shows all devices and browsers that have ever been used to log in to the account, with an approximate IP-based location and the date of the last activity. Regularly checking this list is the only way to notice an unauthorized login in time if your password is leaked: it is easier to spot one unfamiliar entry in the list than to wait until funds disappear from the account.
The minimum setup for the first day
If you are short on time, do three things first: connect an authenticator app instead of SMS, set an anti-phishing code, and enable a withdrawal address whitelist. This blocks the three main attack vectors against a new account—SMS interception, phishing emails, and instant withdrawals to an attacker’s address—and takes no more than five minutes.
You should also make sure that your Binance password is not used anywhere else—not for your email or on other websites. Most cryptocurrency account hacks do not happen through the exchange itself, but through a password leak from another service where the user used the same login and password. A password manager that generates unique combinations automatically eliminates this problem entirely.
What to do after registration: first steps on the exchange
After configuring security, the logical order of actions is as follows: deposit a small amount, buy your first cryptocurrency through the simple purchase interface, learn the exchange’s main sections, and only then, if you wish, move on to more advanced tools such as spot trading with orders or staking.
Depositing funds is covered in a separate section above—by card, bank transfer, or through P2P. For your first purchase, the “Buy Crypto” section with its simple interface is the most convenient: choose the deposit currency, the cryptocurrency you want to buy (beginners usually find it easiest to start with Bitcoin or Ethereum as the most liquid options), and the amount—the exchange rate and final amount to be received are shown immediately, without needing to understand the order book.
Simple purchase (Buy Crypto)
A fixed rate and one-click purchase, suitable for small one-time amounts. The fee is slightly higher than on Spot, but the interface is easy to understand without prior preparation—you do not need to learn about order types.
Spot trading (Spot)
A full exchange order book with market and limit orders, with lower fees. It requires an understanding of how to place orders, so beginners should move here only after making several successful simple purchases.
After your first purchase, it is worth looking at three sections that will be useful later: “Wallet”—your total balance across all exchange sections and transaction history; “Orders”—the history of all trades and current open orders; and “Earn”—the section with staking and savings products, if you become interested in earning a return on cryptocurrency you have already bought rather than simply holding it in your balance.
Keeping large amounts on an exchange permanently is not best practice: an exchange remains a centralized service, and if the platform is hacked or the account is blocked, all your funds could be at risk at once. For amounts that are not needed for active trading in the near future, consider withdrawing them to your own non-custodial wallet. This is a separate topic beyond registration, but a logical next step after your first transactions on the exchange.
Frequently asked questions about registering on Binance
Below are brief answers to questions that most often fall outside the scope of the main guide: deleting an account, registering without an international passport, using the exchange without verification, and changing your country of residence after registration.
Can I register and complete verification without an international passport?
Yes. In most CIS countries, a modern national passport with a machine-readable zone is also accepted, while some countries accept an ID card or driving licence. The system automatically displays the available document types after you select your country—if a national passport is not accepted, the field for it simply will not appear.
Can I use Binance without identity verification just to view prices?
Yes. Price charts, the list of trading pairs, and general market information are available without any registration—you can visit the website directly as a guest. An account, and especially verification, is only required for buying, selling, withdrawals, and any transactions involving real money.
Do I need to complete verification again when moving to another country?
Formally, there is no automatic requirement, but if your new country of residence differs from the one specified during registration, you should update your profile details and address in the Intermediate verification section. Otherwise, when withdrawing a large amount or during a manual review, the system may separately request confirmation of your current place of residence.
Can I register on Binance with a work or university email address?
Technically, yes—there are no restrictions on email domains, but you should not do so: access to a work or university email account may be revoked after you leave your job or finish your studies, and recovering the account without access to the linked email becomes much more difficult. It is better to use a personal email address that will remain with you long term.
How do I delete my Binance account if I no longer need it?
There is no direct “delete account” button in the interface—the request must be submitted through customer support with identity confirmation. Before that, you need to withdraw all remaining funds and cancel open orders: an account with a non-zero balance or active transactions will not be accepted for deletion.
How many Binance accounts can be registered from one device or IP address?
Restrictions on the number of accounts registered from one device or network are not formally published, but the anti-fraud system monitors matches and may request additional verification if several unrelated accounts are registered consecutively from the same IP address or device. This is common in offices and families sharing Wi-Fi and usually does not lead to a block, but only to a more thorough manual verification review.